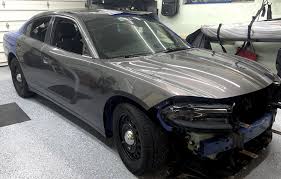
Steps and tips for installing Candy Vinyl Wrap
Installing Candy Vinyl Wrap on your vehicle is an excellent way to give it a sleek, eye-catching look. While it requires patience and precision, the process can be straightforward if you follow the right steps. Here's a guide to help you achieve professional results, along with some helpful tips.
*Step 1: Gather Your Tools and Materials
Before starting, ensure you have the necessary tools and materials:
- Candy vinyl wrap of your choice
- Squeegee or application card
- Heat gun or hair dryer
- Utility knife or precision blade
- Cleaning solution (isopropyl alcohol is recommended)
- Microfiber cloths
- Masking tape (optional)
*Step 2: Prepare the Surface
Proper preparation is key to a flawless application. Begin by thoroughly washing your vehicle to remove dirt, grease, and debris. Once clean, wipe the surface with isopropyl alcohol to eliminate any remaining contaminants. Ensure the surface is completely dry before proceeding.
Tip: Work in a clean, dust-free environment with moderate temperatures (around 70°F/21°C) for optimal results.
*Step 3: Measure and Cut the Vinyl
Measure the area you plan to wrap and cut the vinyl slightly larger than needed. This extra material will allow you to adjust and trim later.
Tip: It's better to have excess vinyl than to come up short. You can always trim off the excess after installation.
*Step 4: Position the Vinyl
Peel back a small section of the backing paper and align the vinyl on the surface. Use masking tape to temporarily secure it in place if needed. Gradually peel away more of the backing paper as you smooth the vinyl onto the surface.
Tip: Avoid stretching the vinyl too much during this step to prevent distortion of the candy finish.
*Step 5: Apply and Smooth
Using a squeegee, start from the center and work outward to remove air bubbles and wrinkles. Apply even pressure as you go. For curved or complex areas, use a heat gun to gently warm the vinyl, making it more pliable and easier to conform to the surface.
Tip: Be cautious with heat—too much can damage the vinyl or alter its color.
*Step 6: Trim Excess Material
Once the vinyl is fully applied and smooth, use a utility knife to carefully trim away any excess material. Pay close attention to edges, seams, and corners for a clean finish.
Tip: Use a steady hand when trimming to avoid cutting into the vehicle's paint.
*Step 7: Seal the Edges
To ensure longevity, apply heat along the edges of the wrap to seal it securely. Press down firmly with your squeegee or fingers to prevent peeling over time.(Blue Vinyl Wrap)
*Step 8: Inspect and Finalize
Give your work a final inspection. Check for any air bubbles or imperfections and make adjustments as needed. If you spot bubbles, use a pin to release trapped air and smooth them out gently.
Final Tip: Allow the vinyl to cure for at least 24 hours before washing or exposing it to harsh elements.
By following these steps and tips, you can achieve a stunning candy vinyl wrap finish that transforms your vehicle's appearance. With practice and patience, you'll master this rewarding DIY project!

